
# Introduction
When building information retrieval and generative AI applications, the Retrieval-Augmented Generation (RAG) model is increasingly favored by developers for its powerful ability to retrieve relevant information from a knowledge base and generate accurate answers. However, to implement an end-to-end local RAG service, not only is an appropriate model required, but also the integration of a robust user interface and an efficient inference framework.
When building a local RAG service, using the easily deployable Docker method can greatly simplify model management and service integration. Here, we rely on the user interface and model inference service provided by Open WebUI, and then introduce the bge-m3 embedding model through Ollama to achieve document vectorization-based retrieval functionality, thereby helping Qwen2.5 generate more accurate answers.
In this article, we will discuss how to quickly start Open WebUI through Docker, synchronize Ollama’s RAG capabilities, and combine the Qwen2.5 model to achieve an efficient document retrieval and generation system.
# Project Overview
This project will use the following key tools:
- Open WebUI: Provides a web interface for user interaction with the model.
- Ollama: Used for managing embedding and large language model inference tasks. Among them, the
bge-m3model in Ollama will be used for document retrieval, and Qwen2.5 will be responsible for answer generation. - Qwen2.5: The model part uses the Qwen 2.5 series launched by Alibaba, providing natural language generation for retrieval-augmented generation services.
In order to implement the RAG service, we need the following steps:
- Deploy Open WebUI as the user interaction interface.
- Configure Ollama for efficient scheduling of the Qwen2.5 series models.
- Use the embedding model named
bge-m3configured by Ollama to implement retrieval vectorization.
# Deploy Open WebUI
Open WebUI provides a simple Docker-based solution, allowing users to launch the web interface directly via Docker without manually configuring numerous dependencies.
First, make sure that Docker is installed on the server. If it is not installed, you can quickly install it using the following command:
| |
Then create a directory to save the Open WebUI data, so the data will not be lost after the project is updated:
| |
Next, we can start Open WebUI with the following command:
| |
If you want to run Open WebUI with Nvidia GPU support, you can use the following command:
| |
Here we expose the Open WebUI service on port 3000 of the machine, which can be accessed via a browser at http://localhost:3000 (for remote access, use the public IP and open port 3000). /DATA/open-webui is the data storage directory, you can adjust this path as needed.
Of course, besides the Docker installation method, you can also install Open WebUI via pip, source code compilation, Podman, and other methods. For more installation methods, please refer to the Open WebUI official documentation .
# Basic Settings
- Enter the account information to be registered, set a strong password!!!
Important
The first registered user will be automatically set as the system administrator, so please ensure you are the first registered user.
- Click the avatar in the lower left corner, select the Admin Panel
- Click Settings in the panel
- Disable allowing new user registrations (optional)
- Click Save in the lower right corner

# Configure Ollama and Qwen2.5
# Deploy Ollama
Install Ollama on the local server. Currently, Ollama offers multiple installation methods. Please refer to Ollama’s official documentation
to download and install the latest version 0.3.11 (Qwen2.5 is only supported starting from this version). For installation details, you can refer to an article I wrote earlier: Ollama: From Beginner to Advanced
.
Start the Ollama service (not needed if started via Docker, but the 11434 port must be exposed):
| |
After the Ollama service starts, you can connect to the Ollama service by visiting http://localhost:11434.
Ollama Library
provides semantic vector models (bge-m3) as well as major text generation models (including Qwen2.5). Next, we will configure Ollama to meet the needs of this project for document retrieval and question-answer generation.
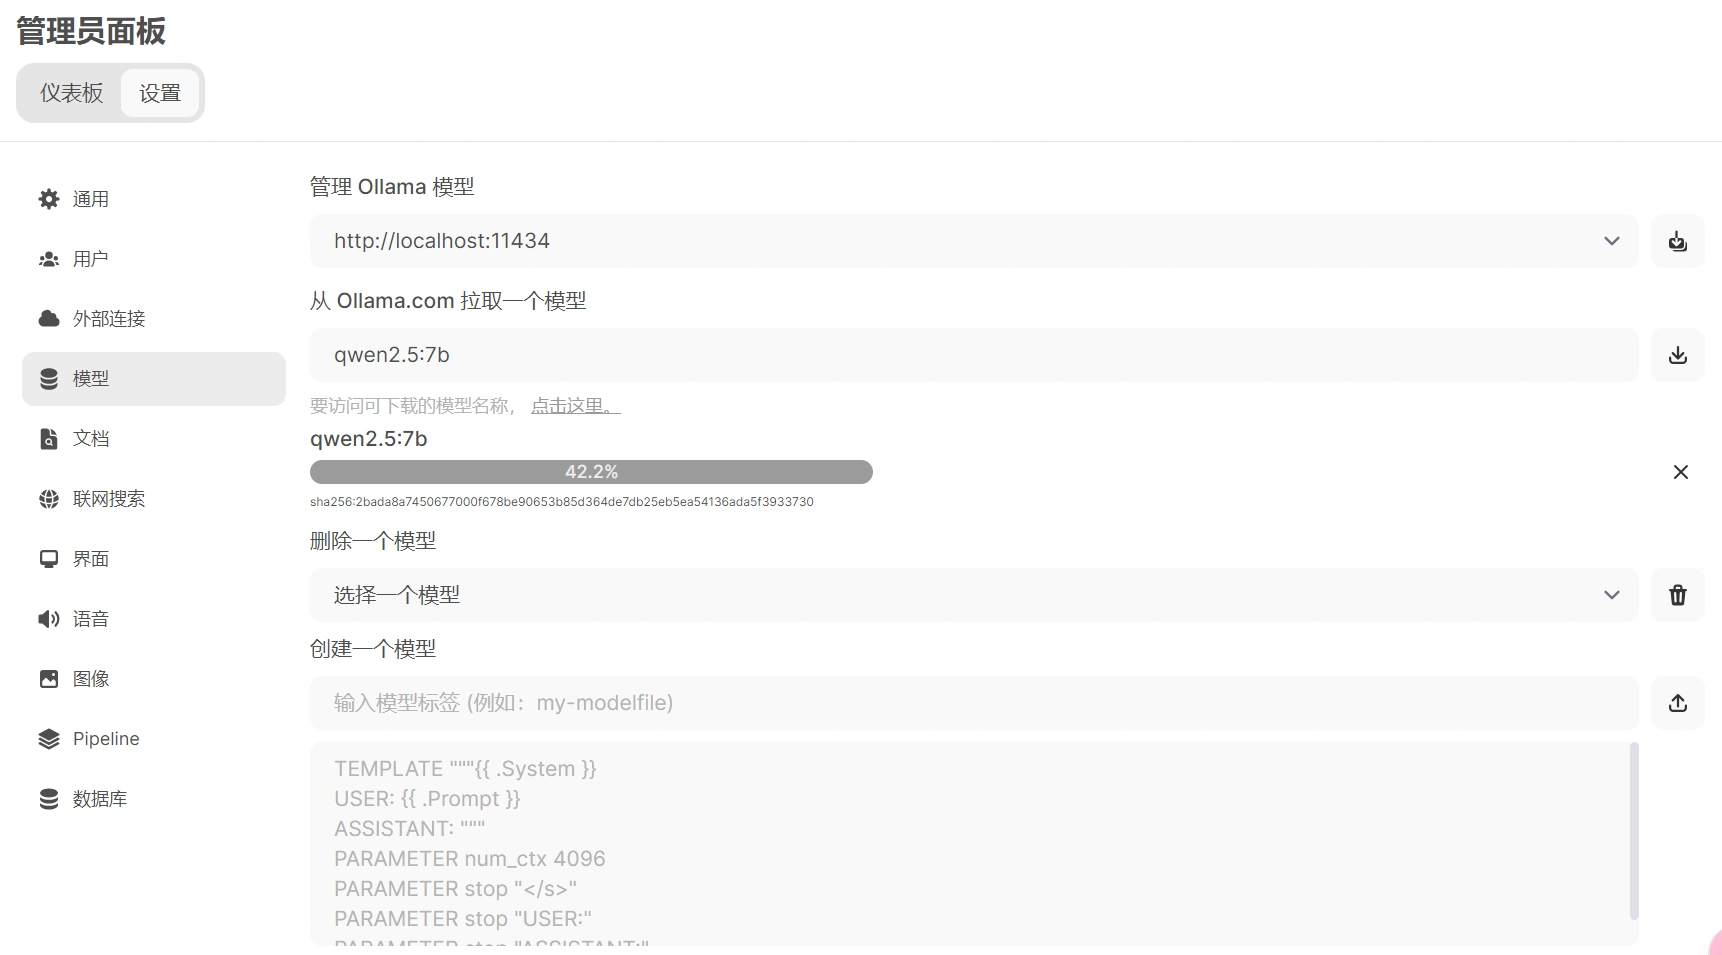
# Download Qwen2.5 model
To install Qwen2.5 through Ollama, you can directly run the ollama pull command in the command line to download the Qwen2.5 model. For example, to download the 72B model of Qwen2.5, you can use the following command:
| |
This command will fetch the Qwen2.5 model from Ollama’s model repository and prepare the runtime environment.
Qwen2.5 offers multiple model sizes, including 72B, 32B, 14B, 7B, 3B, 1.5B, 0.5B, etc. You can choose the appropriate model based on your needs and GPU memory size. I am using a server with 4x V100, so I can directly choose the 72B model. If you require faster token generation speed and can tolerate a slight performance loss, you can use the q4_0 quantized version qwen2.5:72b-instruct-q4_0; if you can tolerate slower token generation speed, you can use qwen2.5:72b-instruct-q5_K_M. For a server with 4x V100, although the q5_K_M model’s token generation is noticeably laggy, I still chose the q5_K_M model to test the performance of Qwen2.5.
For personal computers with less video memory, it is recommended to use the 14B or 7B model, which can be downloaded using the following command:
| |
Or
| |
If you have started both Open WebUI and Ollama services, you can also download the model in the admin panel.
# Download bge-m3 model
Download the bge-m3 model in Ollama, which is used for document vectorization. Run the following command in the command line to download the model (or download it in the Open WebUI interface):
| |
Up to this point, we have completed the configuration of Ollama. Next, we will configure the RAG service in Open WebUI.
# RAG Integration and Configuration
# Configure Ollama’s RAG interface in Open WebUI
# Access Open WebUI management interface
After starting Open WebUI, you can directly access the service address through a web browser, log in to your administrator account, and then enter the administrator panel.
# Set up Ollama interface
In the Open WebUI admin panel, click Settings, you will see the option for external connections, ensure that the address for the Ollama API is host.docker.internal:11434, then click the verify connection button on the right to confirm whether the Ollama service is properly connected.

# Set up semantic vector model
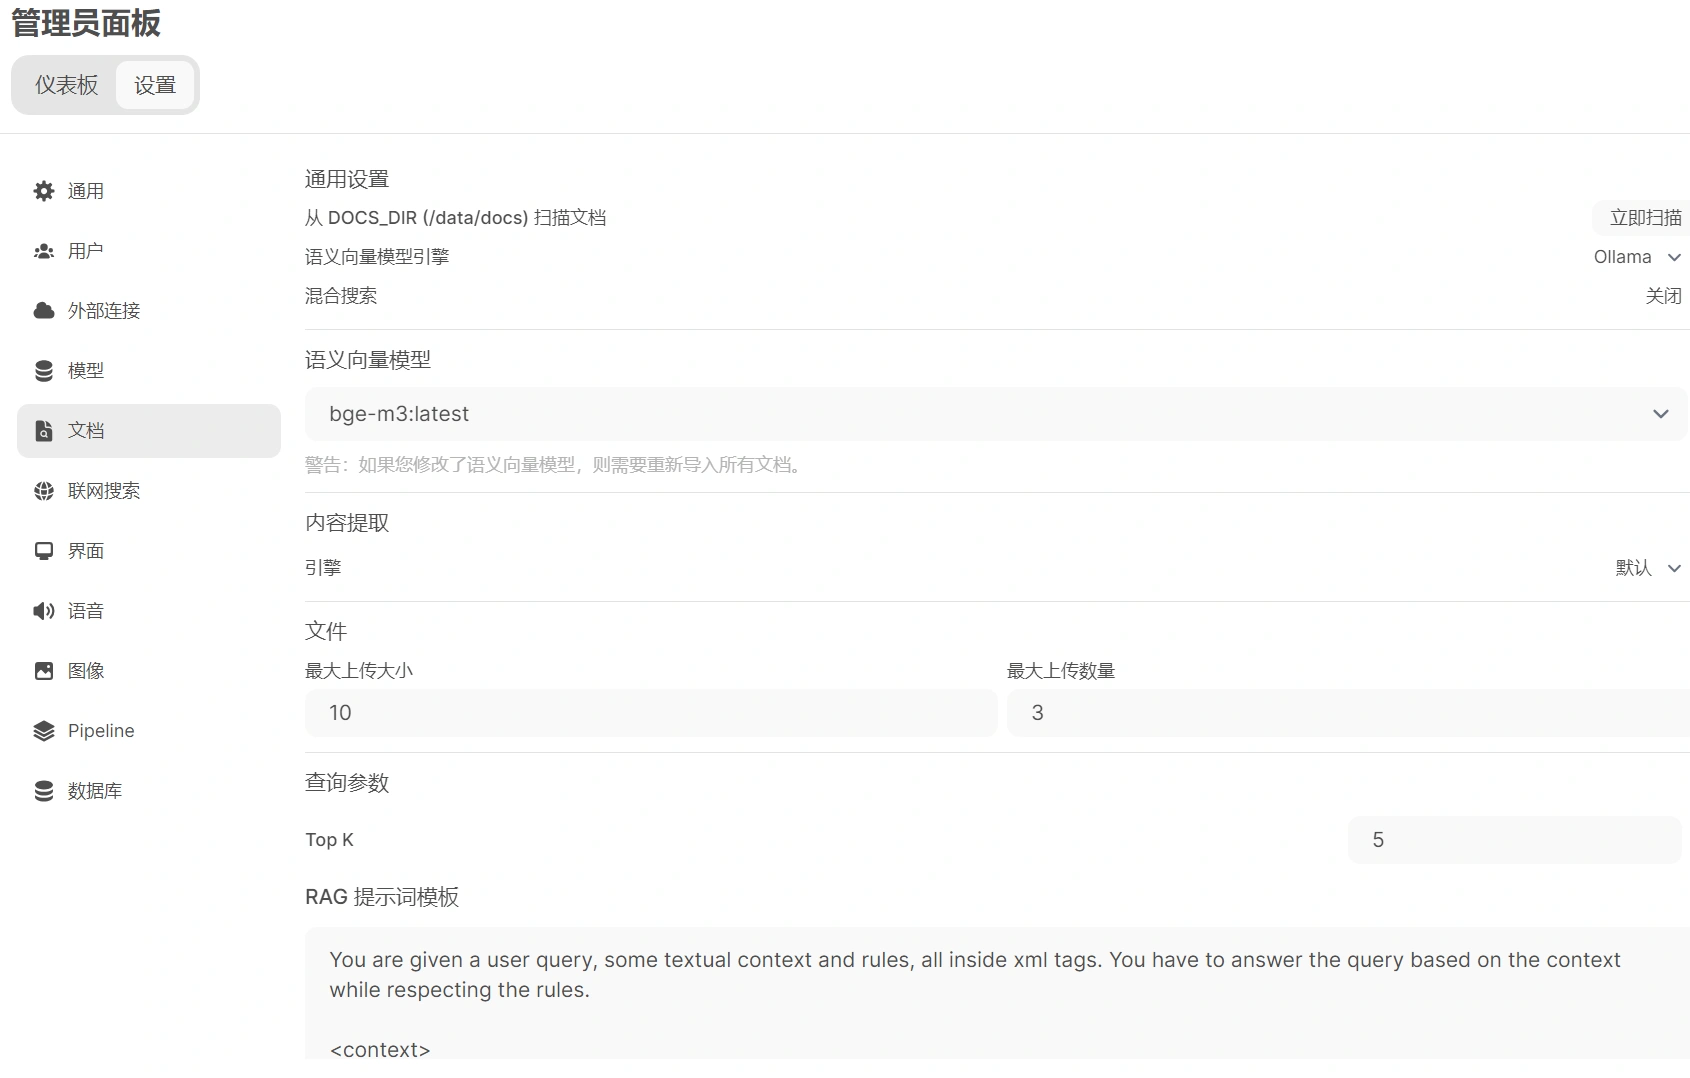
In the Open WebUI admin panel, click Settings, then click Documents, and follow these steps:
- Set the semantic vector model engine to Ollama.
- Set the semantic vector model to
bge-m3:latest. - The remaining settings can be kept as default. Here, I set the maximum file upload size to 10MB, the maximum number of uploads to 3, Top K to 5, block size and block overlap to 1500 and 100 respectively, and enabled PDF image processing.
- Click the bottom right corner to save.
# Test RAG Service
Now, you have implemented a complete local RAG system. You can enter any natural language question in the main interface of Open WebUI, then upload the corresponding document. The system will call the semantic vector model to vectorize the document, then use the Qwen2.5 model to retrieve the document, generate an answer, and return it to the user.
In the Open WebUI user chat interface, upload the document you want to retrieve, then enter your question and click send. Open WebUI will call Ollama’s bge-m3 model for document vectorization processing, and then call the Qwen2.5 model for question and answer generation.
Here I uploaded a simple txt file (text generated by GPT), the content is as follows:
| |
Then three questions were asked separately(in Chinese):
- 艾文在森林中遇到的奇异生物是什么?
- 艾文在洞穴中找到的古老石板上刻的是什么?
- 艾文在祭坛中心发现了什么宝藏?
The following image is the answer:

# Summary
With the help of Open WebUI and Ollama, we can easily build an efficient and intuitive local RAG system. By using the bge-m3 semantic vector model for text vectorization, combined with the Qwen2.5 generation model, users can efficiently interact with document retrieval and enhanced generation tasks within a unified web interface. This not only protects data privacy but also significantly enhances the localization capabilities of generative AI.